Let's face it, not everything goes right 100% all of the time. Even a well-planned project may encounter problems that nobody expected. Nevertheless, it is always better to be prepared and know what problems to expect. Today, I discuss grout haze – a problem that often occurs with both ceramic and cement tile installations. I’ll explain what grout haze is, how to correctly identify the problem, and why it occurs. However, today’s post focuses exclusively on
how to remove grout haze on cement tile installations.
 |
| Cement tiles that needs to be grouted |
What is Grout Haze?
Grout haze is a white to semi-white haze left on the surface of tile after grouting. It is common for haze to remain even if you diligently wipe the surface with a wet sponge during installation. Don't confuse grout haze with similar looking problems created by:
- Applying sealer to a floor that is not clean. The floor wasn't clean when the penetrating sealer was applied and the sealer carried debris, dust, pigment and grout into the crevices.
- Efflorescence. Efflorescence or the formation of salt deposits as water evaporates or leaves from the lime and calcium found in concrete. This problem is usually mitigated with the application of a penetrating sealer since water can no longer pass.
Best Practices for Grouting Cement Tile
If you follow the best practices for grouting cement tile, there is a good chance you will never see grout haze. The most important points are to:
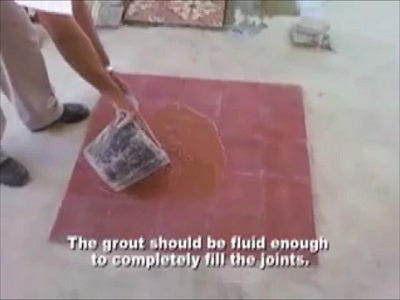
- Have fluid grout
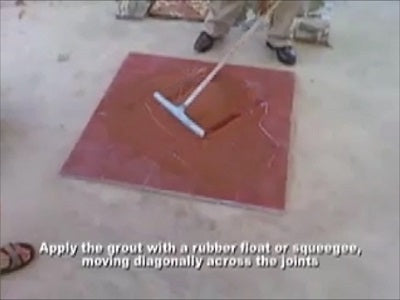
- Float the grout diagonally across the joint
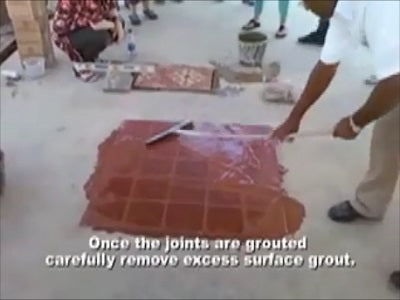
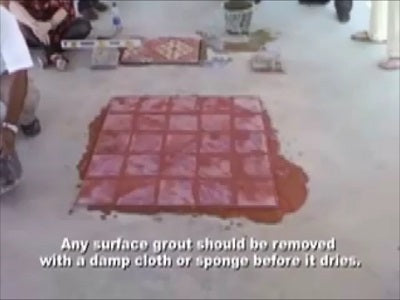
- Quickly remove excess grout with a float and sponge, before it begins to dry.
These same best practices are shown in the steps below.
 |
| Fluid grout ensures each joint is filled |
 |
| Apply grout with a rubber float diagonally across the joints |
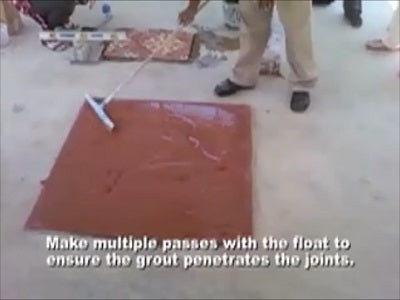
 |
| Make multiple passes with the float |
 |
| Remove excess surface grout |
 |
| Remove any excess surface grout with float & sponge |
Following these steps are the best way to avoid grout haze; but, they alone can't guarantee success. We also have a great video demonstration on
Grouting Cement Tile.
What Causes Grout Haze in Cement Tile Installations?
Grout haze is created by residual minerals left after water has dried from grouting. Remember that grout haze is caused by grouting and is a normal part of tiling. Grout is made of minerals and cement mixed with water. During the installation, the tile is entirely covered with grout because you need to smear grout across the tile. If the grout becomes slightly too dry or dry during application, it can penetrate the cement tile pores. The haze will become apparent after the water on the tile surface evaporates and leaves behind the minerals from the grout. Remember, the grout is applied between the spaces of tile using a tile float, and then wiped away with the same tile float and a wet sponge.
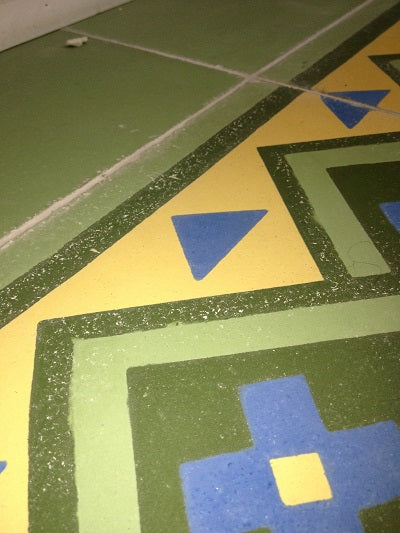
The photo below shows some grout haze. The grout haze is the chalky white specs on the dark green and dark blue.
 |
| Cement tile with grout haze |
Removing Grout Haze
First Rule: Don't panic. If the haze is caused by grout, and not efflorescence, it will often disappear with frequent mopping. Grout may stubbornly adhere to cement tile pores; but, with enough water and elbow grease, it will release. In general, avoid grout haze removers because they are slightly acidic and will damage the tile. I have no experience with such cleaners.
Here is what I usually recommend. These
guidelines apply only to cement tile installations.
- Make sure to physically remove as much grout as possible with a rubber float and then with a sponge.
- Start with a Light Buff & Clean. Buff the floor with a floor polisher and white pad. Use just a bit of water and change the pads frequently to encourage the clean-up of any grout.
- If you don't achieve the results you are looking for, attempt a Deep Cleaning. A deep cleaning is achieved by buffing the floor with a floor polisher and green pad using a lot of water and pH neutral soap. This must be done prior to applying a penetrating sealer. The goal is to really clean the floor of any dust, grout, pigments or debris prior to sealing. The use of a floor polisher and green pad isn't usually necessary on polished tiles. Polished cement tiles are "buffed" at the factory to achieve a satin sheen that simulates the look the tiles acquire after years of normal use and care. The surface of a polished tile is smooth compared to an unpolished or raw cement tile. The smooth surface of a polished tile makes it easier to install because grout is less likely to penetrate the tiles.
- In locally severe locations, use 800 grit wet sandpaper and water to remove excess grout.
It gets down to this. Cement tile is fairly easy to clean with a floor buffer or rags, water, soap and elbow grease. Occasionally, fine grit wet sandpaper may be required to remove excessive deposit of grout. Protect cement tile from oil and acids that will severely damage it.


No comments:
Post a Comment